Sharp Wildlife Images
Unsharp images seems to be one of the biggest gripes we hear from wildlife photographers. Well, there are several reasons why your images may not be sharp, yet most of them are easy to fix.
Here we’ll look at the most common reasons and what you can do to avoid making them in the future.
1. Lens Quality

We often hear some photographers saying that new camera gear won’t make you a better photographer, which is true to an extent. We believe it’s a combination of good gear, knowing how to use it and knowing your subjects but, yes, a bad lens can produce bad images.
What is ‘good gear’ I hear you asking? Well, a consumer/budget
lens isn’t as sharp as a professional lens, which can become obvious when
examining images. Some budget lenses, however, can be sharp and there are many
intermediate lenses that are sharp so it’s advisable to do some research before
purchasing your lens.
For example, I have a Nikon 70-300mm f/5.6 lens – it isn’t as sharp, nor does it focus as fast, as my Sigma 150-600mm Sport lens but it is adequate as a backup lens and when I do use it, utilising the other tips in this lesson, I’m happy with the results.
2. Camera Settings
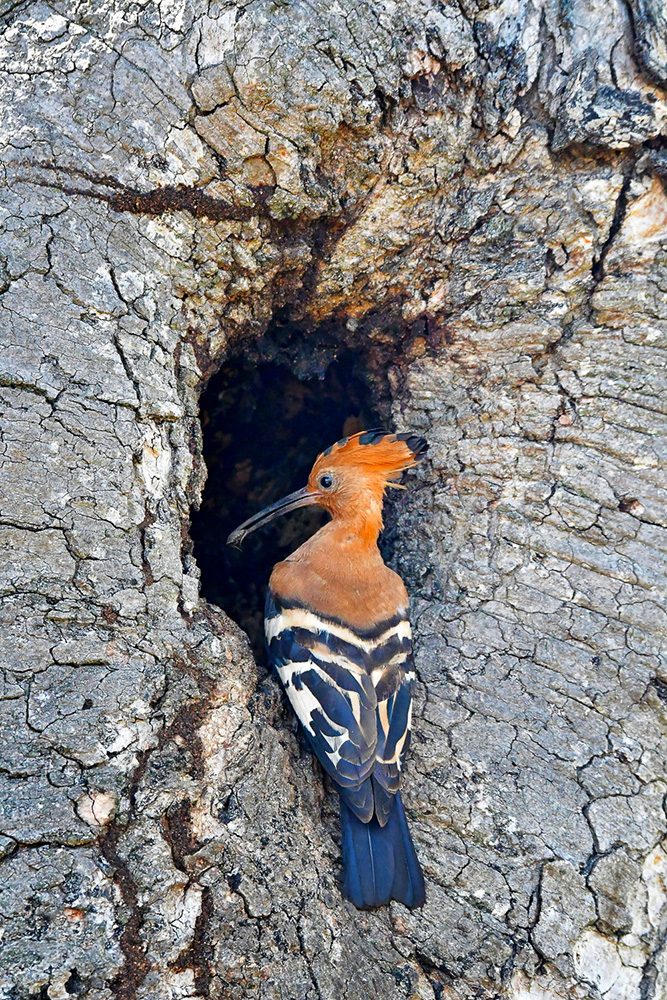 Here we spot-metered off the tree trunk otherwise the camera would have tried to expose for the bright sky behind the tree. In addition, we set the focus to single point AF and pre-focused on the hole where we knew the bird would land.
Here our primary suggestion is to not use the camera’s ‘auto’ functions as follows:
With auto-ISO,
the camera chooses your ISO and we were shooting, with flash, in the Punda
Maria hide at night and I tried out this feature – the camera set the ISO to 51200 and all my images were
over-exposed! The camera saw darkness and over-compensated. The correct ISO was
around 3200 as we were using a spotlight and flash.
With P (program
mode) the camera chooses your exposure settings. This means you have no
control over the aperture, shutter speed or ISO and the camera doesn’t know
what subject you are shooting or what you want to achieve so rather stick with
A (aperture mode) where you set the aperture and the shutter speed changes
accordingly. We use the aperture and ISO to increase or decrease shutter speed
– you just need to keep checking the shutter speed as the light changes during
the day.
With dynamic-area AF the camera chooses which focus points to use. The camera may get it right 80% of the time but the rest of the time the camera chooses to focus on the tree trunk instead of the leopard! Rather choose single-point AF as then you can be confident that the camera will focus on whatever subject you have placed the single AF point on. And try and focus on the eye of the subject – if the eye is in focus it doesn’t matter if the rest of the body isn’t – the image will still look good.
3. Shutter Speed
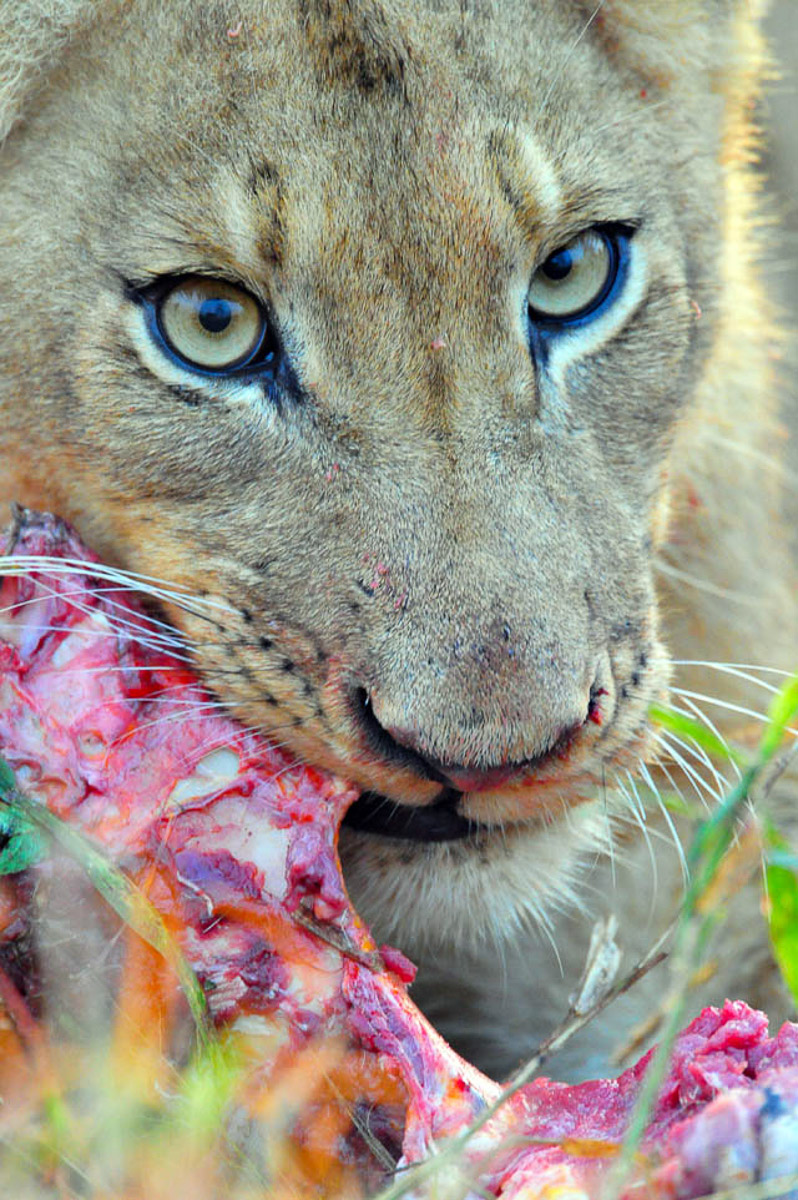
 These lions went from stationary to jumping up at each other in two seconds - if our shutter speed was not set to at least 1 over the focal length, the image would have been blurred.
The shutter speed is to blame for a lack of sharp images in 99% of the cases. A shutter speed that is too slow results in a blurred image.
This is a common mistake and it’s easy to forget to change the shutter speed when you’re on safari. There’s so much to remember; the ISO, the aperture, composition, light direction and then the shutter speed.
The exact shutter speed you need depends on the situation. However, a rule of thumb is to not use a shutter speed slower than 1 over the focal length, for handheld photography. That means that you shouldn’t use a shutter speed slower than 1/100th of a second with a 100mm lens, or slower than 1/600th of a second with a 600mm lens.
This is a guideline only and will also depend on what size sensor your camera has. The above guideline works well with a full-frame sensor, but a crop sensor will require around 50% more shutter speed, so you shouldn’t use a shutter speed slower than 1/1000th of a second with a 600mm lens on a crop-sensor body, like the Nikon D500.
We prefer to err
on the higher side, as stationary animals are known to erupt into action
without any warning, so we like to be prepared for the action when it does
happen.
4. Aperture
Some lenses cause images to be visibly softer at their widest aperture (lowest f-stop number, such as f/2.8 or f/5.6). Most lenses therefore have what is commonly referred to as a “sweet spot” (an area of optimum sharpness). Most often this is around f/8 – but you should experiment with your lens to see what gives you the best results.
We mostly use f/8, for this and another reason - depth of field (DOF). If you are using your lowest f-stop and your lens doesn’t focus on the subject’s eye, but the nose or body, then the image will look soft but if you’re shooting at f/8 and your focus is off the eye, the extra DOF may include the eye so your image looks sharp.
5. Camera Movement
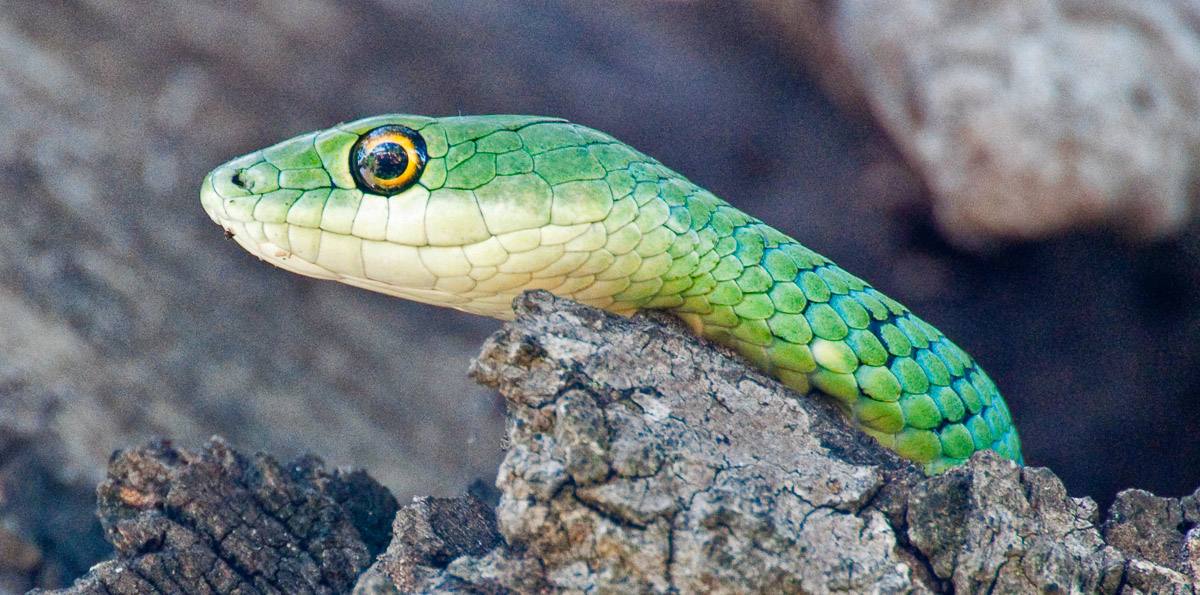
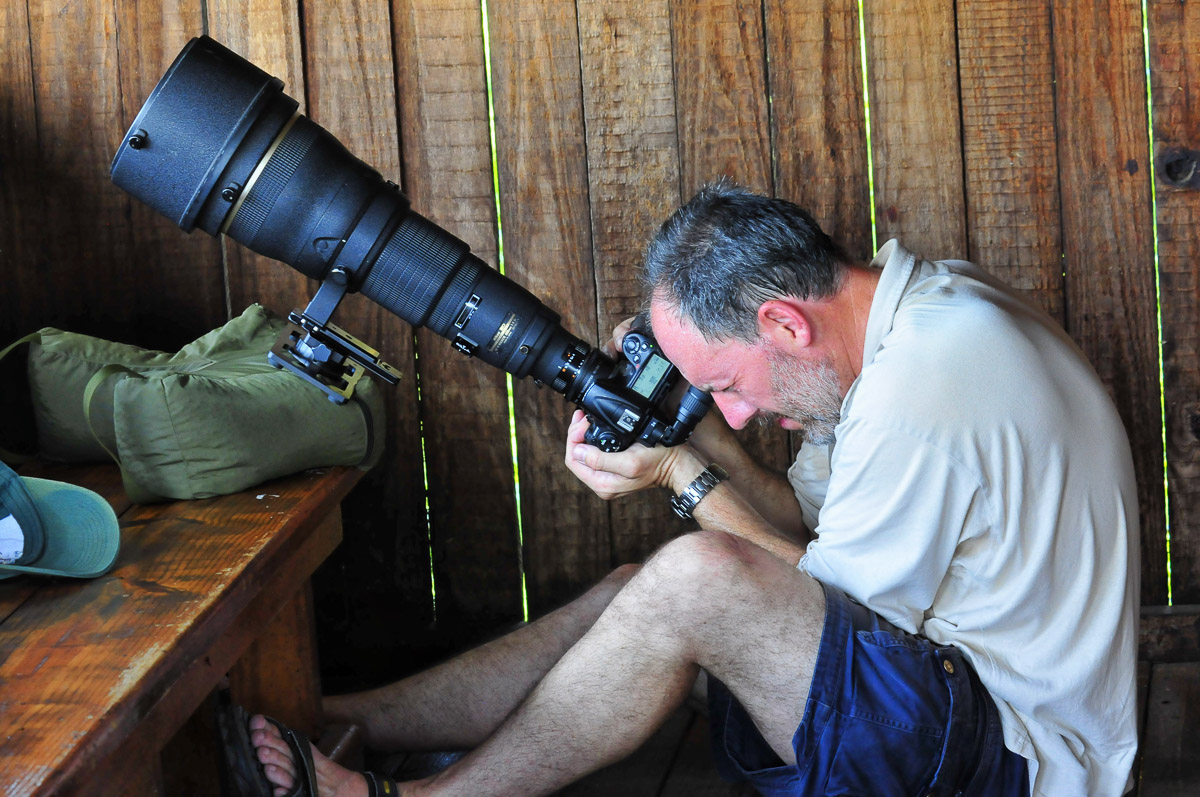 Photographing the spotted bush snake from a hide in the Kruger Park. The lens was too big and heavy to use as we would need to lean out the hide so we improvised by using a beanbag on the bench!
Having a high enough shutter speed takes care of subject movement but you need to also consider you moving your camera and lens.
Try and use a tripod or beanbag and activate image stabilisation / vibration reduction on your camera, especially when hand-holding or using a beanbag and panning plate.
Even when using a tripod and shooting with slow
shutter you may still get camera vibration, caused by:
·
you moving or bumping the tripod / camera,
· the wind blowing the tripod,
· the vibrations from a bridge or wooden floor where people are walking
· from you pressing the shutter button too hard, so rather use a remote cable when on a tripod or, when hand-holding, gently depress the shutter button - don't stab it!
· mirror slap (use the mirror lock-up function)
· image stabilisation (switch the IS/VR off when the camera is on a tripod)
6. The Weather
Sometimes the weather makes it difficult or impossible to capture a sharp image.
The most common reason is lots of dust particles in the air and high temperatures that cause heat-haze. This problem is made worse when photographing distant subjects as you are shooting through more dust and/or heat.
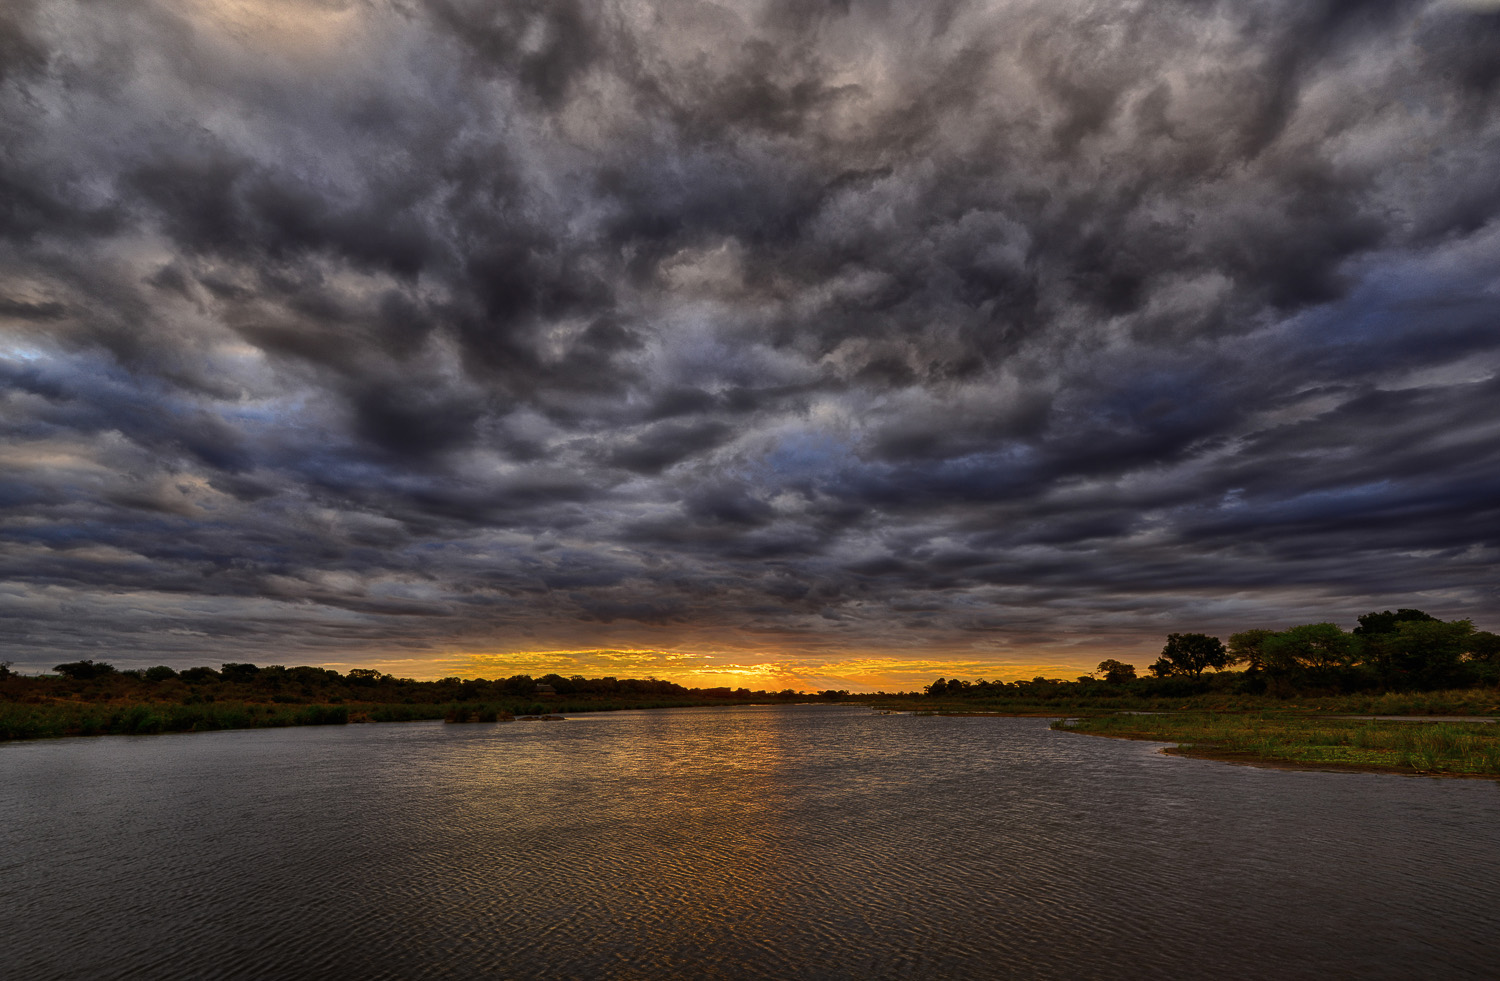
Therefore we stress that you should try and get closer to the subject or shoot during the blue and golden hours when the heat is minimal and the light quality and direction is best.
Return from Sharp Wildlife Images to Safari Photo Tips


To make a safari rental booking in South Africa, Botswana or Namibia click here

"It's 768 pages of the most amazing information. It consists of, well, everything really. Photography info...area info...hidden roads..special places....what they have seen almost road by road. Where to stay just outside the Park...camp information. It takes quite a lot to impress me but I really feel that this book, which was 7 years in the making, is exceptional." - Janey Coetzee, founder of CAROK (Camps and Roads of Kruger) South Africa
"Having a passion for the region itself and having to know about all dynamics, water holes and ideal roads for a period of 6 years - I wish I had this guide on my first trip already!" - Morkel Erasmus, Secunda, South Africa
"Mario and Jenny take you to places that are not always visited, and their descriptions of the more remote camps will allow you to make an informed decision without wasting time and money" - Bob & Sherry Shepardson, DeBary, Florida, USA
"Your time and money are valuable and the information in this book will help you save both." - Don Stilton, Florida, USA
"I highly recommend the book to anyone visiting Etosha National Park to photograph the animals - or anyone considering an African photography safari in the future." - Anne Darling, Cognac, France
"As a photographer and someone who has visited and taken photographs in the Pilanesberg National Park, I can safely say that with the knowledge gained from this eBook, your experiences and photographs will be much more memorable." - Alastair Stewart, BC, Canada
"This work is so much more than an eBook, because it is also a guide, a tutorial, an inspiration and a must-have for anyone interested in wildlife photography" - Findtripinfo.com, USA
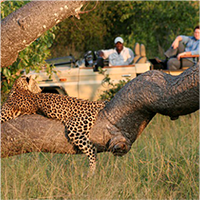
Photo Safaris on a Private Vehicle - just You, the guide & the animals!