Exposure Compensation
You have various choices on your camera for both exposure and metering.
You have four choices for exposure:
• Program or automatic - here the camera does all the thinking and sets the aperture and shutter speed.
• Shutter Priority or TV mode - you choose your shutter speed and the camera sets the aperture based on the light coming through the lens
• Aperture Priority or AV mode - you choose the aperture and the camera sets the relevant shutter speed.
• Manual - you set the shutter speed and the size of the aperture. Manual mode is good for very difficult lighting situations.
Most professional wildlife photographers shoot in Aperture priority mode to provide control over DOF (Depth Of Field). Most modern cameras have a TTL (through The Lens) metering system that measures the amount of light entering the lens and then calculates the exposure. If your camera is set on aperture-priority the exposure will be based on the ISO and aperture settings that will automatically provide the shutter speed.
The TTL meter tries to calculate what is termed 'Middle-tone' for every shot you take. Middle-tone is 18% gray, which is the tone that is halfway between black and white. Remember that your meter does not see color - it sees each color in tones and each color has a middle-tone that equals 18% gray.
If your subject is middle-tone in color then your exposure will be accurate but if your subject is not middle-tone your exposure may be over or under-exposed. This is when you need to compensate for the camera in order to ensure an accurate-looking photograph.
What does your camera do with different tones...
When your camera sees dark tones, such as a wet buffalo, it opens up (the shutter stays open a bit longer to let in more light) to make the buffalo a middle-tone - this will over-expose your subject.
When your camera sees light tones, such as a white egret, it closes down (lets in less light) to make the egret a middle-tone - this will under-expose your egret.
Two things to keep in mind...
You also need to keep in mind the rest of the scene - if the buffalo is standing in front of some water, at a dam or waterhole, the TTL meter will take this lighter color into consideration with the dark buffalo tone and your final exposure may be mid-tone and therefore correct for the buffalo.
But if the background is also dark then the scene most probably will be over-exposed.
The other thing that will influence the exposure is your metering mode.
Most cameras provide you with three metering choices:
1. 3D / Matrix metering - the camera meters the whole frame and provides, in most cases, an accurate exposure.
2. Center-weighted metering - the camera meters the entire frame but assigns the greatest weight to the centre area.
3. Spot metering - the camera meters just off the small focus point that you have selected. Here your subject will be perfectly exposed and the rest of the frame is ignored.
I have sometimes set this button to spot-metering, for a sunset as an example, and then forgotten to move it back to matrix and I wonder why my photos are over or under exposed!
When do you dial in more, when do you dial in less and when do you leave the exposure as the matrix meter saw it...
+ Exposure Compensation: White and bright yellow feathers and flower petals
No Exposure Compensation: mid-tone subjects such as lions (watch for the black-maned Kalahari lions when doing portraits), leopards, cheetahs, impala, waterbuck
- Exposure Compensation: dark animals such as elephant, rhino, buffalo, wildebeest, black feathers and up to 2 stops for elephants, buffalo and rhinos that are wet as they will be darker.
Always take a test shot to see what the exposure looks like or meter of a mid-tone subject in the same light as your subject, such as grass or sky, and then meter off your subject and if the two readings of shutter speeds are the same your photo will be correctly exposed.
If you don't get the exposure right you can always try and rectify it in Camera Raw / Photoshop. We suggest you shoot RAW files and not JPEGs as you can do so much more in post processing with RAW files, but ideally you should be striving to get the exposure right in camera.
Exposure Compensation is just another tool that you can use to improve your photographs and to limit the time you spend in front of your computer doing post processing.
Return from Exposure Compensation to Safari Photo Tips

 Subscribe To This Site


To make a safari rental booking in South Africa, Botswana or Namibia click here

"It's 764 pages of the most amazing information. It consists of, well, everything really. Photography info...area info...hidden roads..special places....what they have seen almost road by road. Where to stay just outside the Park...camp information. It takes quite a lot to impress me but I really feel that this book, which was 7 years in the making, is exceptional." - Janey Coetzee, South Africa

"Your time and money are valuable and the information in this Etosha eBook will help you save both."
-Don Stilton, Florida, USA
"As a photographer and someone who has visited and taken photographs in the Pilanesberg National Park, I can safely say that with the knowledge gained from this eBook, your experiences and photographs will be much more memorable."
-Alastair Stewart, BC, Canada
"This eBook will be extremely useful for a wide spectrum of photography enthusiasts, from beginners to even professional photographers."
- Tobie Oosthuizen, Pretoria, South Africa
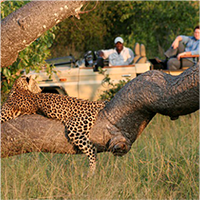
Photo Safaris on a Private Vehicle - just You, the guide & the animals!