Choices for Photographing a Cheetah Kill
Tobie Oosthuizen was in the Kgalagadi Transfrontier Park and he photographed a cheetah kill with the same female cheetah that we photographed the previous week (see our Kgalagadi Trip Report for that story)- except Tobie's photos were better than the ones we got!
He was disappointed with his shots and, yes, there are some things he could have done better but overall he got some great shots and learnt some lessons that we can all learn from.
Here is Tobie's Cheetah Kill story:
I was sitting on my dune cabin deck at unit number four at Urikaruus camp on Thursday 21 April. For those who are not familiar with the camp the waterhole is approximately 50m away and the units are elevated with the deck probably 2 to 3 meters above ground level.
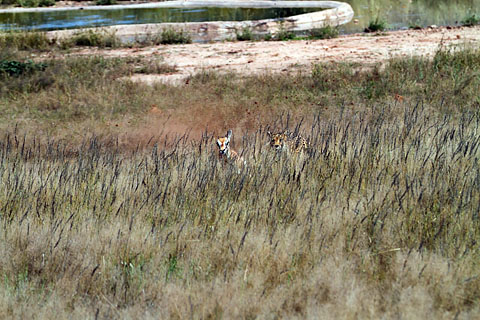
At about 13h00 a cheetah came for a drink from the left and while there, a large herd of springbuck approached from the right. The grass was fairly tall and she hid from sight. The wind direction was favoring her so I knew that there was a good chance of some action and had to quickly decide on camera settings and lens choices.
I had the following two options:
1. Canon 7D with Canon 500mm IS USM lens on tripod on Wimberley Gimbal head
2. Canon 7D with Canon 70-200mm IS ll lens and 1.4x lll converter (providing a 100-280mm zoom) hand held
I was alone so could only use one option and had about 3 minutes to decide on settings and which lens I was going to use.
I went with option 2 as I was scared that I would not have the ability to follow the action with the 500mm and wanted a slightly wider shot so I opted for the 70-200mm and 1.4x tele-converter. I also guessed the action would come closer to me so I should be ok. I started with 180 mm zoom setting.
I had the following settings on the 7d and this is where I made my biggest mistake:
• Exposure mode: Shutter priority - 1/1250 sec (too slow)
• Aperture: F/4.5 (camera selected)
• ISO: 125 (camera selected)
• Exposure compensation: - 1/3
• Focus mode: Al servo AF
• AF point: expansion
• Release mode: Low speed continuous
The action started suddenly and was over in about 30 seconds.
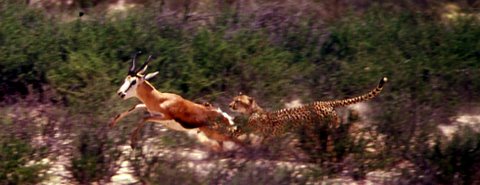
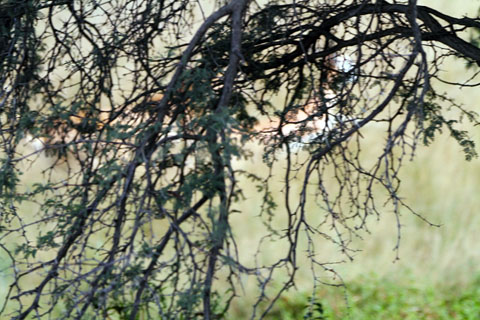
The cheetah erupted from her hiding place and chased the springbok, who started running in all directions...


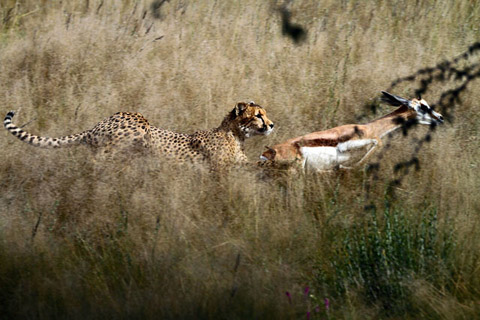
Here the direction changes as the springbok starts to zigzag and now the cheetah is coming towards us but the grass is much longer...
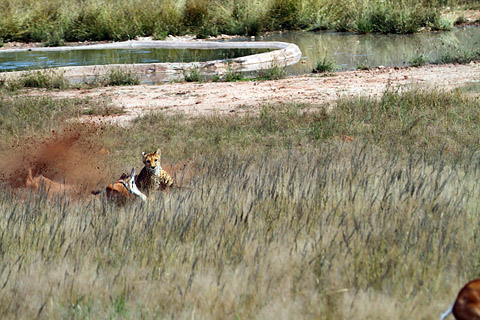
Unfortunately the actual kill took place behind the tree that is in front of unit number four...
I then ran over to the neighbour's deck and got this shot of her dragging the kill to a tree on the opposite bank of the Auob...

My problem is that although the cheetah kill photos look acceptable, as soon as you start cropping you notice that the focus is not sharp (the focus point is not on the subject) and this was not helped by the f4.5 aperture that my 7D selected!
In hindsight the ideal would have been to start of with the 500mm and later switch to 70-200mm as the last action would have been too close for 500mm. But to switch lenses seamlessly for an event that took just 30 seconds would have been a big challenge!
Michael Schaake was staying next door to Tobie in unit number three and he captured the cheetah chase and kill on video with his Panasonic GH2 and 45-200mm lens...
The whole event including the cheetah hiding in the grass and the waiting/anticipation while the sprinbok herd walked past the waterhole took about 30 seconds but the actual chase and kill was over in just eight seconds!
There would have been no time for Tobie to put down one camera and pick up a second camera.
The Cheetah Kill Lessons
• Tobie may have got some tighter action shots (less cropping needed) by starting off with the 500mm lens and in Retrospect that may have been the right thing to do, as the cheetah chased the springbok starting off in fairly open ground and ending in tall grass after zigzagging after the springbok. The grass at the end of the chase ensured that no matter what lens was used the subject would be hard to see or photograph.
• The cheetah kill pics may have been sharper if the camera was set on aperture priority with f8 as the chosen aperture. Between F/8 and f/11 is considered the 'sweet-spot' of a lens and tends to produce the sharpest results. In addition f/8 would have produced a sharper pic because of the greater DOF (Depth Of Field) - more of the subject would have been in focus than at f4.
• A shutter speed of 1/2000 sec may have produced sharper images as the cheetah runs at speeds of up to 120 km per hour and the lens was hand-held.
• The ISO would then have needed to be increased to about 800 to allow for the increase in shutter speed and the increase in aperture. (I think most photographers would prefer a grainy but sharp image instead of a smooth but blurred image. A noise reduction progrm like Noise Ninja can fix the grain but what does the photographer do about the out-of-focus subject!?)
• High speed continuous may have produced more 'keepers' than shooting at low speed continuous.
• Even though the focus point was not on the subject, I think the AF point set to 'expansion' was correct especially for a fast moving erratic subject like a cheetah chasing a springbok. Not many cameras can keep up with such a fast animal!
Daryl Balfour also made a few suggestions, without seeing Tobie's cheetah kill photographs...
Although I'm not familiar with canon equipment - i.e. I'm not sure if the 7D is full-frame sensor or not - I probably would have set up with the 500mm and 1.4 TC on the Wimberley.
I'd set high enough ISO so that I could get a really fast shutter speed, preferably about 1/2000th+ at f8 - given that you were shooting at midday I'd guess the light was good, so ISO 640 - 800 would probably do it.
I'd shoot a test frame of the general area the chase would happen and maybe also of the Springbok, and check the histogram and blinkies for correct exposure...those white flanks blow out!
Naturally I'd have the drive set on high speed and AF-C. And make sure I've got a lot of space on the CF card in the camera!
After seeing Tobie's pics I think Daryl's suggestions make most sense and we would go with Daryl's camera settings but would have used both lenses - Jenny would have been shooting with her 80-400mm lens while I would have been shooting with my 600mm f4.
Teamwork would have (hopefully) ensured that we got the initial chase that was further away and then the cheetah kill that was much closer.
Seeing and photographing a cheetah kill is a privilege and maybe even a once-in-a-lifetime experience.
I think Tobie got some great shots, especially the first few where the cheetah was in the open so he can be proud of himself!
Some photographers have panicked in these types of action-adrenalin moments and have ended up with unusable pics.
He visits the Kgalagadi once a year for two weeks at a time and I'm sure the next time he visits he, or you and I for that matter, will have a better idea of making the right choices for photographing a cheetah kill.
I think Tobie summed it up very nicely by saying "the more you practice the luckier you get!"
Practice is one of the Five-P's that all serious photographers should apply if they want to improve their
creative process in nature photography.
In addition to 'practice', another principle that we learnt while photographing our very first cheetah kill in the Kgalagadi in 2000 was that of patience!
Return from Cheetah Kill to Photographic Vision page

 Subscribe To This Site


To make a safari rental booking in South Africa, Botswana or Namibia click here

"It's 764 pages of the most amazing information. It consists of, well, everything really. Photography info...area info...hidden roads..special places....what they have seen almost road by road. Where to stay just outside the Park...camp information. It takes quite a lot to impress me but I really feel that this book, which was 7 years in the making, is exceptional." - Janey Coetzee, South Africa

"Your time and money are valuable and the information in this Etosha eBook will help you save both."
-Don Stilton, Florida, USA
"As a photographer and someone who has visited and taken photographs in the Pilanesberg National Park, I can safely say that with the knowledge gained from this eBook, your experiences and photographs will be much more memorable."
-Alastair Stewart, BC, Canada
"This eBook will be extremely useful for a wide spectrum of photography enthusiasts, from beginners to even professional photographers."
- Tobie Oosthuizen, Pretoria, South Africa
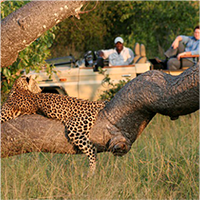
Photo Safaris on a Private Vehicle - just You, the guide & the animals!
New! Comments
Have your say about what you just read! Please leave us a comment in the box below.