Photographing Birds in Flight

Photographing birds in flight is not as difficult as it may seem to be. When we first started wildlife photography in 1995 we shied away from photographing flying birds but with some practice and learning from trial and error, we have managed to get some decent shots and you can too.
Here are our Top-15 tips for Shooting Birds in Flight...
1. Use a sturdy support - either a tripod, bean-bag or good hand-holding technique. The tripod should have a gimbal head for ease of tracking. Handholding can sometimes be more beneficial than using a tripod as you can respond much quicker when you see a subject.
If you have a small lens such as a 300 f4, 300 F2.8, 80-400 zoom or even the 200-400 zoom, handholding is comfortable. When not shooting keep your arms down to avoid arm-fatigue! The much heavier super telephotos such as the 400mm f2.8, 500mm f4 and 600mm f4 are extremely difficult to handhold.
2. You need a steady left hand (if you are right-handed), which you place under the lens barrel to support the lens. If your lens has a tripod collar either remove it or swivel it around so that it sits on top of the lens, out of your way.
3. When tracking the flying bird keep your panning motion smooth to ensure good focus and composition.

4. If the bird is far away then set the lens focus limit switch to 'Limit' after focusing at the far distance. This will reduce the AF search time and will speed up focus acquisition. If you leave the switch on 'Full' then the lens will focus through the whole distance range from infinity to close. Some lenses provide three options; Full, infinity to 10 meters or 10 meters to 2 meters, depending what your lens's closest focusing distance is.
5. Start focusing on the bird while it is still small in the frame. Don't wait until the bird is close to you otherwise you will waste time with 'focus hunting' and by then the bird is gone.
6. If you use a zoom lens, acquire the bird using the wide setting and zoom-in to fill the frame once you have the bird in focus.

7. If there is a tree or other object between you and the bird you could pre-focus on that object and when the bird reaches it you then switch focus onto the bird. This pre-focusing will reduce the time it takes to acquire the initial focus of the bird and this small time saving can be the difference between getting a shot or missing it.
8. Use Continuous Servo auto focus mode, which will allow you to track your subject and maintain focus as it flies.
9. Use Continuous high speed (CH) release mode, which allows you to shoot up to 6 frames per second with the Nikon D7000 and D300 and between 9 -11 frames with the D3s, depending on whether you are using full frame or crop.
Keep in mind that the bird will be flapping its wings and some shots will have the wing covering the face, the eyes may be closed, some shots will be out of focus and so forth. By shooting such high frame rates you will get a few that are in focus, with good exposure and composition!

10. Set your active auto focus point to the center point as this is the most sensitive and accurate focus point. You can always crop the photo later to get a more pleasing composition.
11. You will lose focus as the bird is flying so gently pump the shutter button to reacquire focus while tracking the bird
12. When the bird starts getting large in the frame and you have it in focus that's when you depress the shutter button and start getting photographs!

13. Exposure can be a problem and we have had many over-exposed or under-exposed photographs of birds in flight. This problem can be eliminated if you shoot with the sun behind you. This means shooting early and late in the day which in turn means your shadow should be pointing towards the bird.
14. Shoot at high shutter speeds - in the region of 1/1750 sec and remember that smaller birds will fly faster than bigger birds
15. On overcast days you can shoot all day but just add more light to your exposure - anything from 1 to 3 stops more, depending on how overcast the day is.

So there you have it - our top-15 tips that will help improve your photography of birds in flight!
Return from Birds in Flight to Safari Photo Tips

 Subscribe To This Site


To make a safari rental booking in South Africa, Botswana or Namibia click here

"It's 764 pages of the most amazing information. It consists of, well, everything really. Photography info...area info...hidden roads..special places....what they have seen almost road by road. Where to stay just outside the Park...camp information. It takes quite a lot to impress me but I really feel that this book, which was 7 years in the making, is exceptional." - Janey Coetzee, South Africa

"Your time and money are valuable and the information in this Etosha eBook will help you save both."
-Don Stilton, Florida, USA
"As a photographer and someone who has visited and taken photographs in the Pilanesberg National Park, I can safely say that with the knowledge gained from this eBook, your experiences and photographs will be much more memorable."
-Alastair Stewart, BC, Canada
"This eBook will be extremely useful for a wide spectrum of photography enthusiasts, from beginners to even professional photographers."
- Tobie Oosthuizen, Pretoria, South Africa
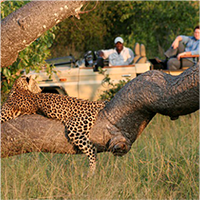
Photo Safaris on a Private Vehicle - just You, the guide & the animals!
New! Comments
Have your say about what you just read! Please leave us a comment in the box below.